This tutorial requires you to connect to the VPN network first. For more information, visit the VPN tutorial.
This tutorial consists of 4 parts:
- Logging into the Quanta IPMI web interface
- Power Control
- Launching the KVM Console
- Using the KVM Console
| Tested Environment OS version: Windows 7 / Mac OS X (Non-retina) Browser Version:
|
Logging into the Quanta IPMI web interface
- After you have successfully logged into the VPN, open any web browser and go to the IP Address (For example, 192.168.1.2) assigned for your server's management portal.
- Enter your username and password to log in.
Note that if you see a red cross (before logging in, please configure your computer such that all the red crosses are gone before continuing.
Power Control
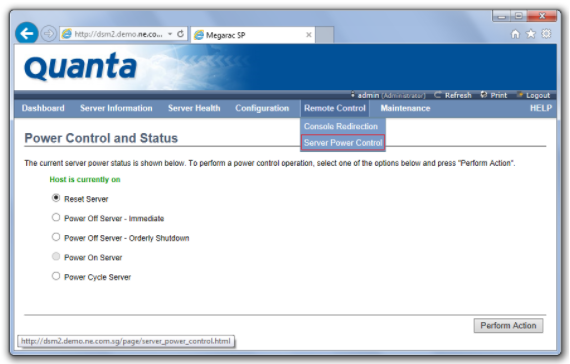
- In the Remote Control tab, click Server Power Control.
- You can now follow what is displayed on the screen to perform your desired power control actions.
Launching the KVM Console
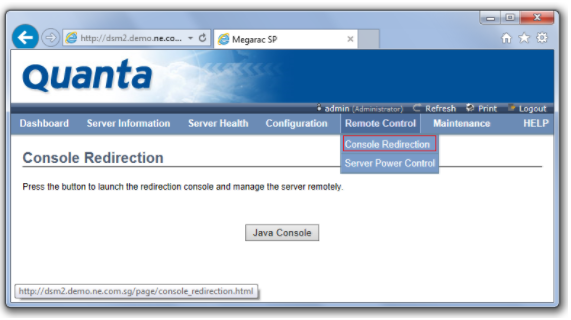
- In the Remote Control tab, click Console Redirection.
- Click Java Console to download the Java viewer to launch the console.
For Internet Explorer:
Click Open to directly run jviewer.jnlp.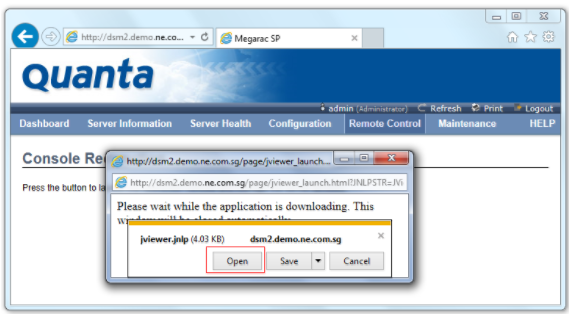
For Google Chrome:
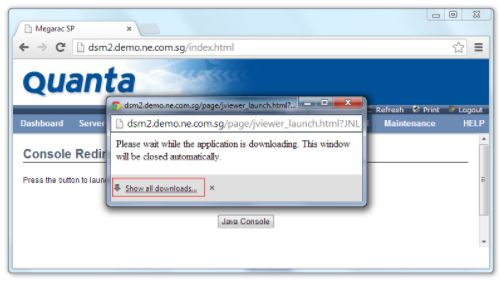
- Click Show all downloads to show all downloaded files.
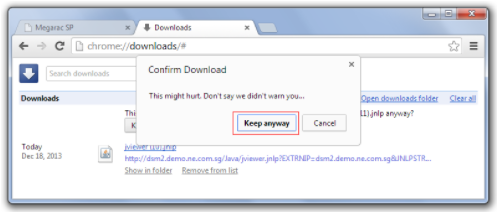
- Click Keep to download jviewer.jnlp, clicking Keep anyway if there are additional pop-ups.
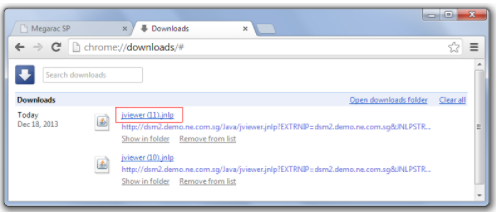
- Click jviewer.jnlp to launch.
- Click Show all downloads to show all downloaded files.
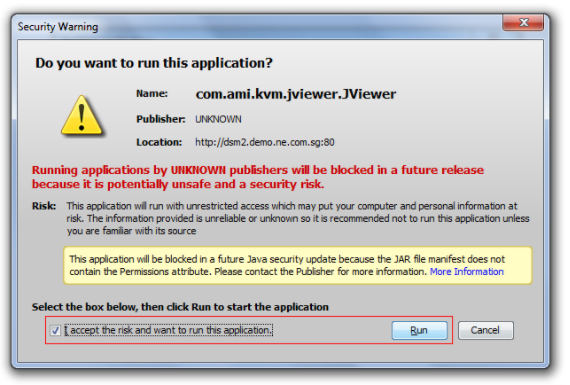
- If you see a security warning, please click I accept the risk and want to run this application, and click Run.
Using the KVM Console
1. Keyboard Usage
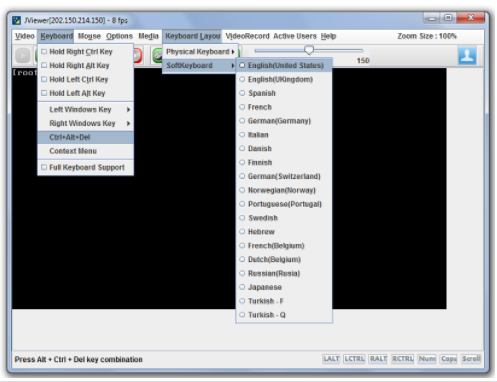
- To send the Ctrl-Alt-Delete signal, go to Keyboard > Ctrl+Alt+Delete.
- If you wish to have an on-screen keyboard, go to Keyboard Layout > Soft Keyboard.
2. Mounting CD-ROM images
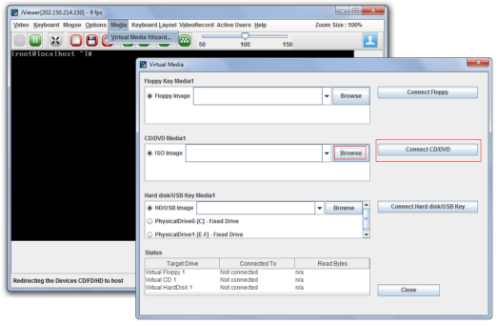
- In Media, click Virtual Media Wizard.
- Click Browse, select the image that you wish to load and click Connect CD/DVD.
